Once upon a time I read a story about Jamil building a coldroom in a shed in his backyard. And I thought “I want one”. When I bought my house in La Mesa it had a walk in ‘basement’ off of the garage. I had intended to build one there but life happened. When we moved to TX we were looking for a house that would be suitable for brewing. Ideally I wanted a 3 car garage but that wasn’t an option for the size house we wanted. Eventually we found a house that met all our criteria and had a 9’x14′ extension built into the garage.
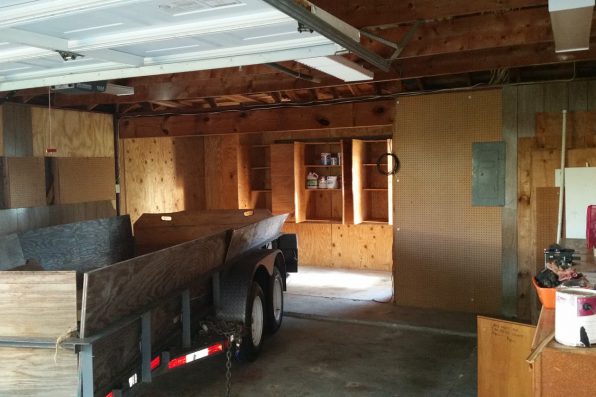
Before:
This project also included adding a sink to the garage, adding water, adding a new panel and more power, finishing the garage and epoxying the floor. Quite a bit of work so I don’t have costs broken down very well because of all the other improvements we did. This is my brewing paradise….that my wife parks her car in. She said yes to everything I wanted and with that being her only demand the only proper response is “Yes Dear.”
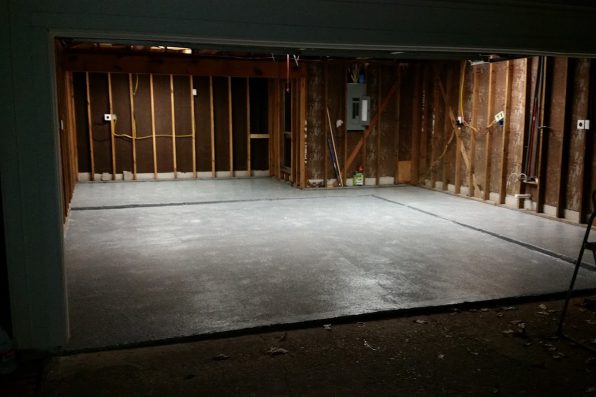
So we gut it and epoxy the floor.
New Panel, more power added, water added. Added a 220v for the tablesaw and a 220v for the cold room AC. Which as it turns out is overkill, you only need 220v if you buy a window unit with a heater, so that 220v was later moved to the right and another 110v was added to the coldroom. The floor epoxy is from Sherwin-Williams. It’s not cheap so buy it when it goes on sale which is quarterly. We had to buy 3 kits. The most important part is doing all the prep work, which includes power washing, degrease, acid wash and powerwash again. Since this slab was poured in the late 70’s it had a LOT of crud on it. I cannot count how many hours I spent scrubbing this floor.
The BUILD:
Skill Level:
Moderate
Tools needed:
Hammer
Tablesaw
Nail Gun
Impact driver
Materials
2×6
1″ Plywood
Spray Insulation
Silicone Caulk (buy a case)
Rigid Insulation
Plastic Sheets
Plastic sheeting
Hardboard
AC Unit
Cool Bot
Keg Rack
Bottle Shelves
A lot of the cost is going to be determined by the R value you want and the size of the cold room. I had initially wanted 4×8 so all the material would be easy to size but Harold talked me out of it explaining “You’ll want to be able to turn around inside”. Plus, you’ll need keg racks so you need to find a solution that can also carry all the weight. Consider this in your design, you do not want to block the AC unit which needs to blow the long axis of your room. And you need to consider what type of door, I went with a 30″ wide metal outdoor door.
You need a minimum of an R25 factor for the cold room and since this is for beer you’ll want it down to 38F. If you can go with a higher R factor, do it, this will save you $ in the long run. To size the AC you need the SQ FT, temp and how often you intend to open the door, because that is when your room loses it’s efficiency and the AC unit has to kick back on. There is a lot to plan and also realize the big box stores will not carry AC-only units when it’s not summer.
Why did we choose spray insulation? A few reasons:
- We were working within a confined footprint and wanted to maximize space. The closed cell spray insulation has an R6/1in dept. We went with 4″ true walls (we ripped down 2×6 to true 1.75×4). Then we added rigid insulation inside.
- This is more expensive but it adheres to the wood studs and with the humidity here we thought this would be a better option.
We added rigid plastic sheets inside, but be aware, you shouldn’t be hanging shelves off the walls, if you do you need to add something much more structurally sound and you do not want to damage your insulation. We also added plastic sheeting, the best way to think about it is there is a firehose pointed at your cold box and you want to make sure outside air/moisture cannot penetrate your walls. The plastic sheeting goes on the exterior of your wall. This isn’t really necessary with the spray insulation, but we did it anyway, why risk any small mistakes.
Design everything, place everything on paper of where you’re going to put the AC, shelving, shanks etc…
You need to insulate the floor and the ceiling and forget putting a drain in, it will only be a siphon to lose all your cold air. Our floor had 1″ plywood floors, that we glued/siliconed it, then added 2 coats of epoxy.
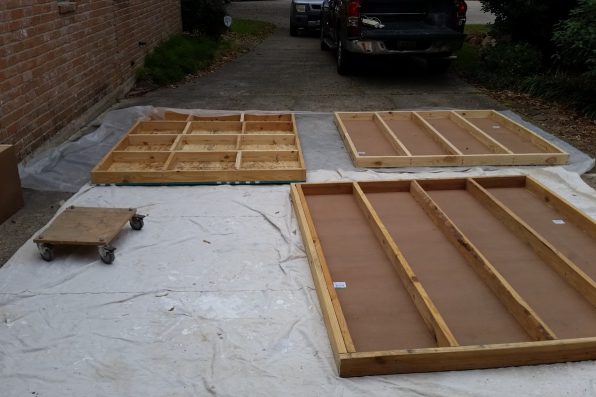
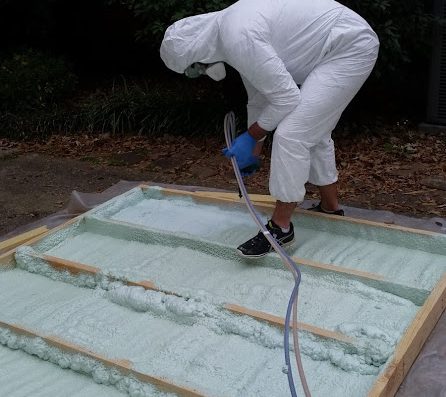
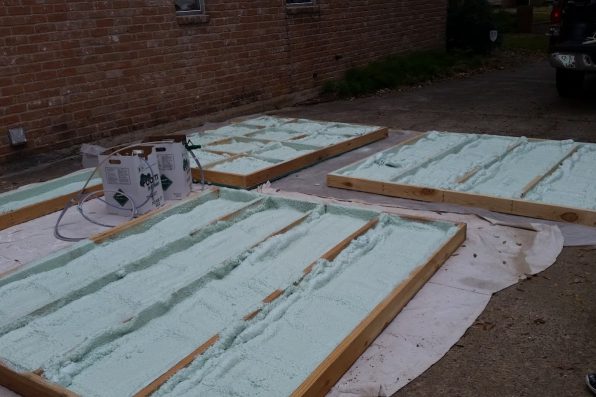
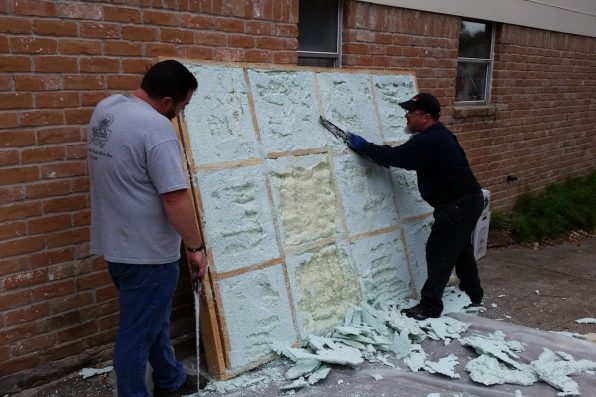
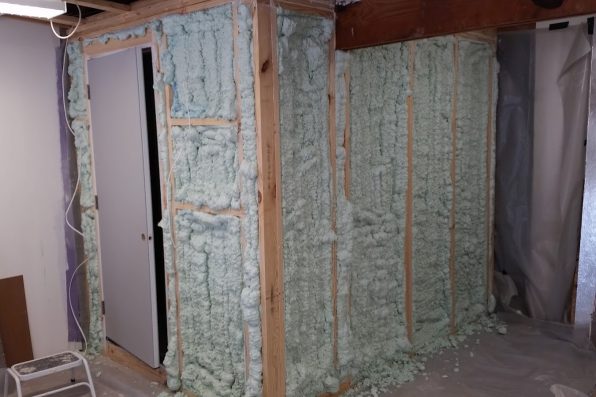
We pre-built the walls and brought them outside to spray. This was dumb, spray them in a vertical position, it’ll save your back a lot of ache. It takes some getting used to but you will need to buy 15% more product (if spray) as you get used to it expanding. You will have to cut any foam down to the studs, so just use an old school manual cross cut saw.
Now for the photos:
Back left: floor, back right: ceiling, front right: left wall. We used the hardboard to spray against. You could use plywood. Due to the beam crossing my cold room a lot had to be built seperate and installed in pieces. The walls go all the way to the concrete and the floor sits inside, the ceiling sits on top of the walls.
You lay the foam down in 1″ thick passes, and then it expands. I would work from pieces to piece of all 3 parts, and you had to wait 15mins between passes. The foam has instructions of how to store the gun and prep it for the next pass. This wasn’t fun.
In progress. You can see where the back hits the studs how the foam tends to double up as it expands to the side and up at the same time. It starts to become lumpy but you can work around this by learning as you go of how to add insulation. And you just keep making progress until the cavity is full. Then you cut it back:
2 members of my local club (Cane Island Alers) came by to help out. You can see the waste, wasn’t too happy about this but since I was the one doing the spraying it’s all on me. They are working on the floor here.
Meanwhile, in the garage we added reflecting ply to radiate back out infrared waves, this was only done to the 2 exterior walls:
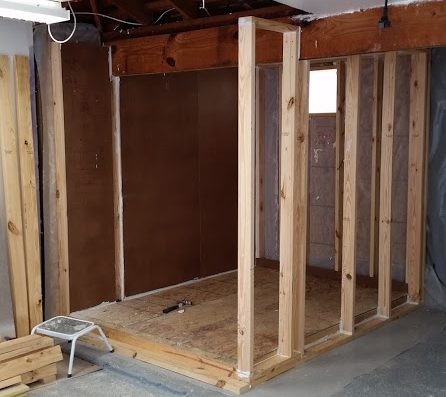
You can see the AC window opening, the reflecting ply is shiny on the other side, and the plastic sheeting in place. The white on the studs is glue, to help keep everything in place.
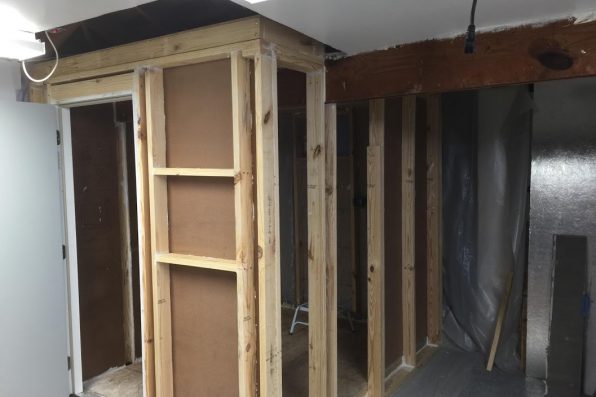
Here’s a good shot of what we had to deal with with the beam. The left walls are 2 pieces and extend down to the concrete. Then we added the floor which has silicone where it butts up against the left wall, and it’s toe-screwed in. The ceiling is in place and it took all 4 of us to lift it up and in. The back and right walls are then framed in and silicone applied to the top sill, then the ceiling was pulled down onto it and screwed into place. The rest of the walls will be sprayed in place. A second ceiling on this side of the beam will also be added.
Door is added, you can see to the right of the door where the tap area is framed in. I did spray this but when cutting through for the taps the insulation tended to disintegrate. In hindsight I would probably put rigid insulation in this box than spray. Hardboard is added to the interior and then to the interior of the right wall until it’s ‘walled’ in.
Suit up and keep spraying, both the exterior and also the interior back wall. Once this is all done you grab the saw and cut it event with the studs. In the event you have any big gaps just use the spray canned insulation you buy at Home Depot. After this was cleaned up, we added plastic sheeting to reduce moisture penetrating the walls.
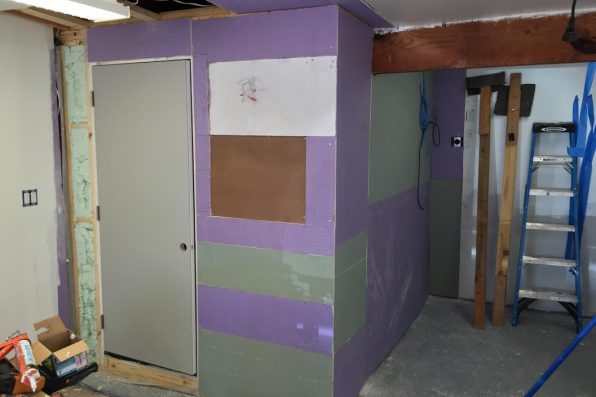
Then add your drywall. Why is it different colors? Because Homedepot sells one type and Lowe’s sells another. On the left you see 2 light switches, one for lights inside the cold room and the other for lights above the taps.
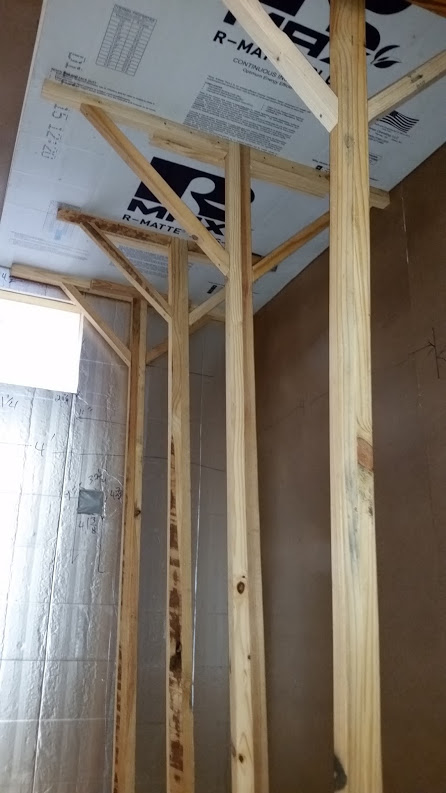
At this point I was worried the R factor wouldn’t be high enough and the interior footprint was larger than 6×8 so I didn’t worry about adding sheets of 1″ insulation to the inside for another R5 factor. But the ceiling was a bit more difficult:
So we built stilts out of all the leftover wood from cutting down the 2×6’s. Let nothing go to waste. This was glued in place and siliconed around the edges. We knew the room was well insulated because with both my dad and I in there working it became hot fast.
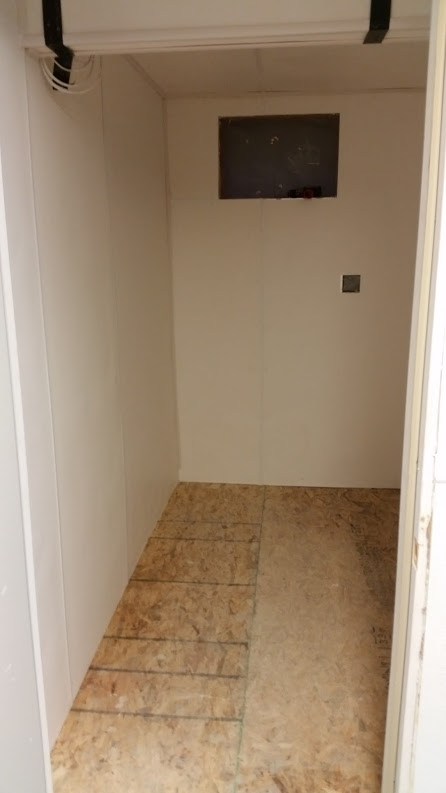
There is Fiberglass Reinforced Plastic (FRP) and this other hard (but floppy) plastic sheet without the fiberglass. It’s a bit less expensive so we went with it, and used the FRP connector pieces. This is a REAL pain in the ass to put up, even after everything else, this still was tough. Mostly because it’s so flexible and the room insulated so well it just gets hot.
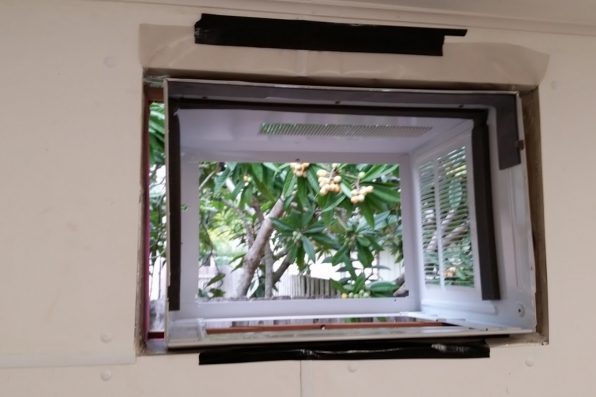
Follow the AC unit install instructions, actually make sure you read them before you build out the opening. Then use the HD can spray insulation to seal this puppy up.
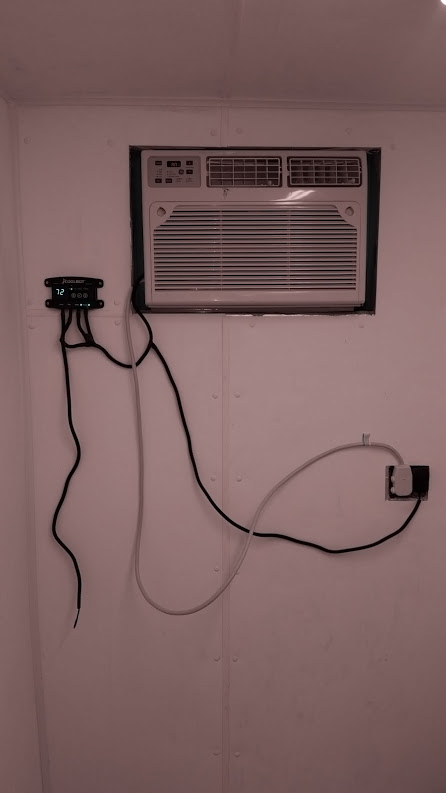
AC with CoolBot. I later flipped the AC unit outlet so the cord would hang down.
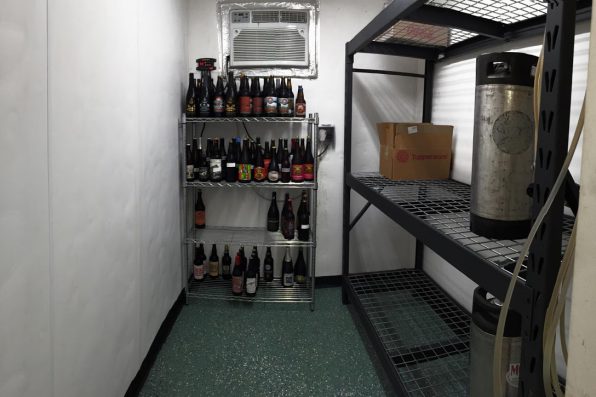
The finished inside of the cold room with epoxy down (green because it was 40% off) and rubber trim to keep any water out of the walls. Home Depot metal shelving, nothing fancy but heavy duty enough to store kegs.
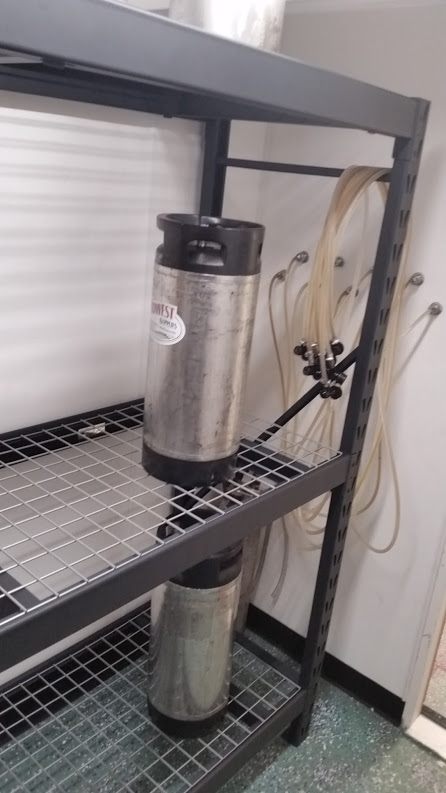
Inside with pin locks shown.
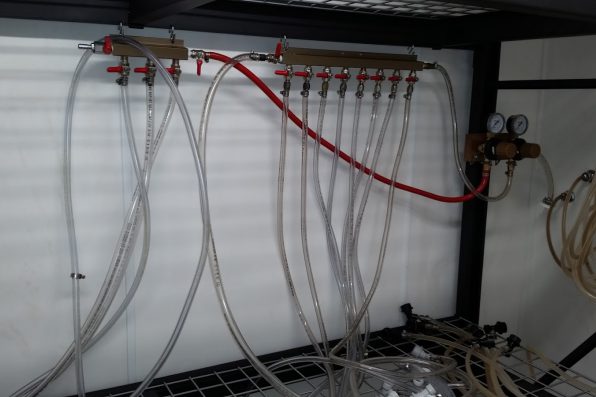
Gas lines with everything mounted to the keg rack. No extra holes in the walls. I had to drill through the stand which wasn’t fun, wish I had thought about this before moving the rack in. Then I used “S” hooks to hang them. 2 stage controller for higher carbonation and for regular ales.
We added 3 sheets of insulation to the door and then skinned it in the same plastic sheet.
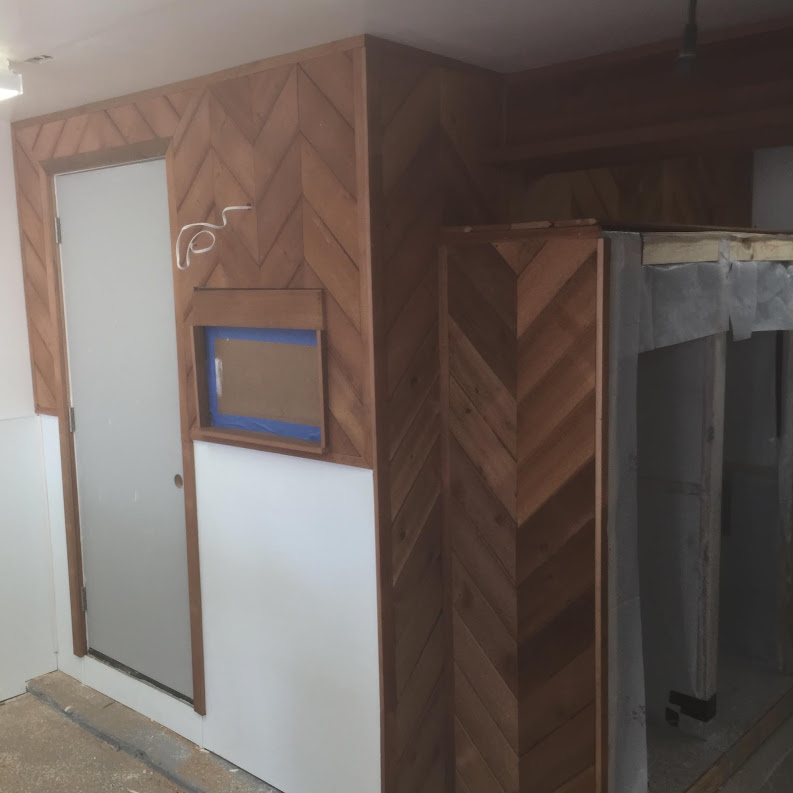
Now it helps if your father has a cabinetry shop. The white is the FRP and the wood is re-purposed cedar my dad got from a neighbor. Erin wanted the pattern. The 2 chambers on the right are for the conicals. Each in its own insulated room so I can pull glycol from the cold room reservoir to chill them.
And here is the finished product. I sprayed the door and one can had a different nozzle than the other which created a cloud. I now have to re-epoxy the floor. Very unhappy about that. The other thing is with much thicker walls, you will need much longer shanks. 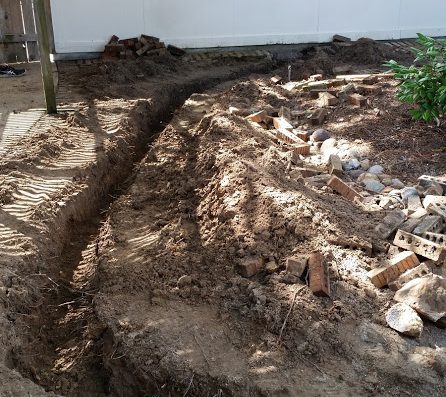
The other major brewing upgrade was to install a sink in the garage. So we had to trench for the sewer line (sewer exits the rear of the house to a utility easement along the back of the parcel).
The SS sink and shelf came from a restaurant supply auction house. These are seconds that wouldn’t pass inspection in a commercial kitchen, but not an issue for my garage. Plus they were pretty cheap. I added the second faucet on the left and ran hot water to it for a bottle rinser. The middle shelf is built out of teak and isn’t as deep to hold all the fragile hardware. It is really nice having the R bin full of PBW solution, the middle for Star-San and the left for rinsing/drain. Eventually I’ll add an RO system to this so I can stop buying 25 gallons of water at a time.
The entire garage was finished out with drywall and FRP and rubber baseboard so I can easily clean up.
This was not a cheap project since we added a lot to the garage in addition to the cold room. I’m still not done building out the conical temp control storage but it’s a work in progress. For awhile we had the cold room at 50F and it was costing 50 cents a day to run, we dropped it to 38F a few weeks back just as it got really damn hot, so I don’t have a basis to compare it to since we’ve yet to live in this house for a year. It’s maintaining temp and after a day of brewing in 115F heat (w/ index) it’s rather refreshing to step into the cold room for awhile.
EW


