


Nothing like waiting 2 years for the rest of this build, right? Sorry about that, sort of changed jobs and moved to a different state.
My system is built to work without a pump and as a batch sparge setup using gravity. With the pump, I can create a HERMs. For the HERMs to work I added the MoreBeer Ultimate Sparge Arm on a custom jig in the coolertun. And I built a larger copper drain setup to help the rectangle cooler drain efficiently, but it simply won’t be quite as effective as a round setup. The jig I built out of teak since it’ll resist water and not need a finish. However, if you use teak, it is very oily and you need to use 2 part epoxy in the joins.
 The issue with the way I built this is that it’s not 100% center. So if you do build a jig, double check those measurements. And since you’ve got a HERMs setup, there’s no reason to have a lid. But of course you need to build a different wort delivery system since this sparge arm is supposed to sit outside of a kettle. So just using SS parts I built:
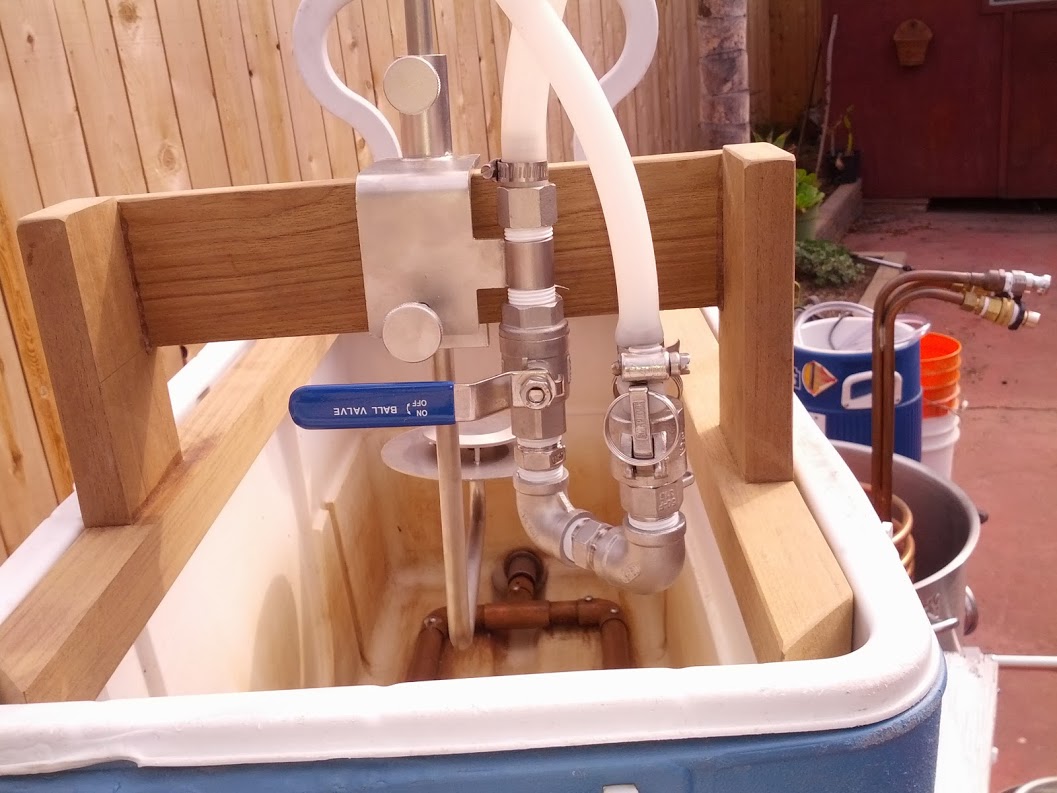 This works but if you are maxing out your MT it will be submerged. Not a big deal, just more to clean up later. As far as SS quick disconnects go I’ve now used both the more beer type QD’s and the Brewer’s Hardware cam-lock (shown here, and used entirely on this system). Truth be told, I prefer the cam-locks, they involve less burning of your fingers and the key-ring works really really well to hang them on hooks to dry. The more beer type doesn’t have it and they’re always flopping around. My 2 cents, I’m not to the point of changing all mine out, but I’m close.
Now you need a March/Chugger pump. Lots of writeups on these, they’re basically the same. Just remember these are not-self priming pumps. Which means they must below the kettle with the liquid you want to move. I had 2 mounting stations on my setup, just to lower the head height to make it more efficient. Or just buy longer tubing.
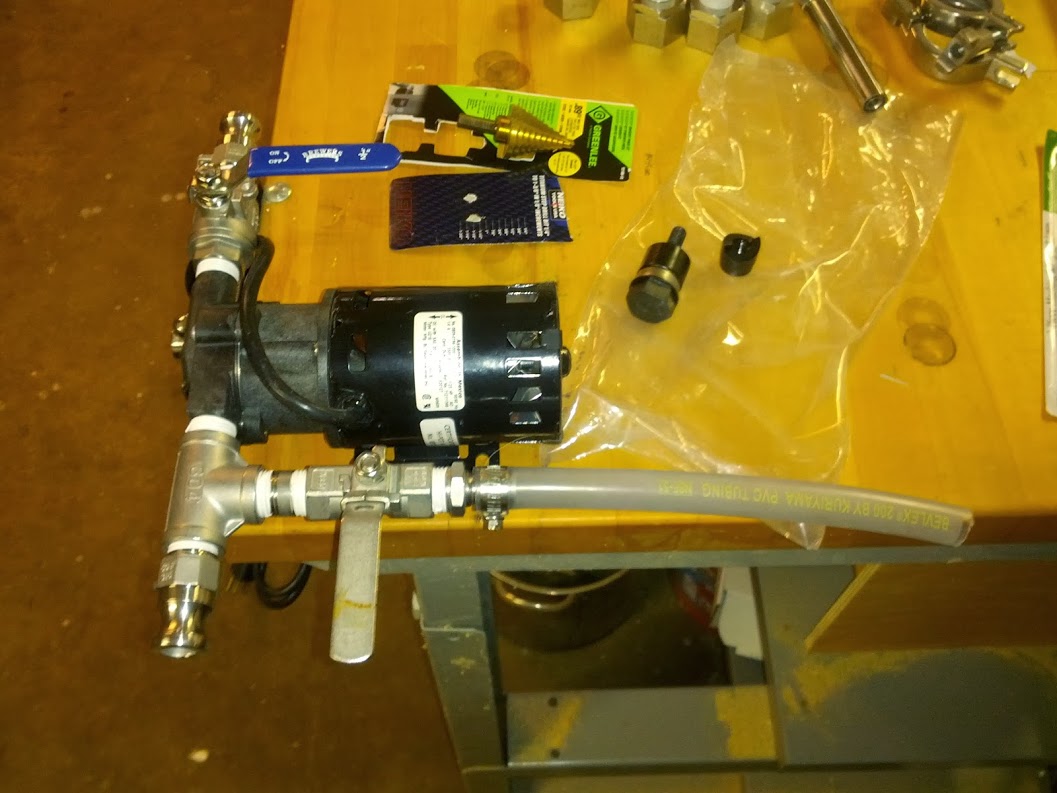
This is a march pump with bleeder valve. You can buy it from more beer complete, or buy the parts and some plumbers tape and DIY. You need 1 tee, 2 ball valves, 3 nipple, 1 barb and whatever QD’s you’re using. Just make sure everything is 1/2″ full bore or full flow, you don’t want any restrictions.
That takes care of the MT and pump, plus you need a lot of silicone tubing. How much depends on how far you need to go. This stuff is not cheap but it can be boiled and will last a LONG time. I don’t recommend using idophor to sanitize it because it will discolor it and turn it ugly yellow. Just use Star San.
So what is the point of a HERMS (HEat Recirculating Mash System)? What this does is when your mash temp lowers below your target temp, the controller turns on the pump and it draws wort from the MT and up through a heat exchanger in the HLT and raises the temp, then returns it to the MT via the Ultimate Sparge Arm. In a cooler setup, it is still critical you nail your mash temps on the 1st infusion because adjusting takes time and you do not want to run your pump at full throttle. Why? The digital probe can take awhile to register and it can be easy to over heat. And cooling down is much more difficult. Also remember most conversion is done in the 1st 20 minutes, so you only have a small window to get the mash right.
So know your system and how to nail your mash temps right off. Ok, all that being said you’re probably asking yourself, why in the hell do I even need all this nonsense? Well, in a cooler setup, you probably don’t. But…this setup allows you to do 2 other things that manual vorloufing in a batch sparge setup is difficult. #1, mashing out and #2 auto vorloufing. You generally keep your HLT at 170F, and with my system here, it means you light the HLT burner when needed by keeping an eye on the temp gauge. If it’s a little hotter it won’t kill you, don’t sweat it.
When your mash is done, turn the pump on (manually or by setting the controller to 168F and letting it turn it on). Keep the HLT burner low, to keep the temp there on target. Now the worst part of batch sparging is automated and at the VERY least you’ll get some kickass clear wort after 15 minutes and you’ll have raised the mash temp, ending conversion. This alone is worth all the BS.
HLT: What do you need?
Thermowell in the MT.Heat Exchanger in the HLT.
HLT Pot (mine was aluminium)
Ball valve
Weldless Kit x2
Temp Guage
First, put a thermowell in your MT if you want to automate this (12″ is better).
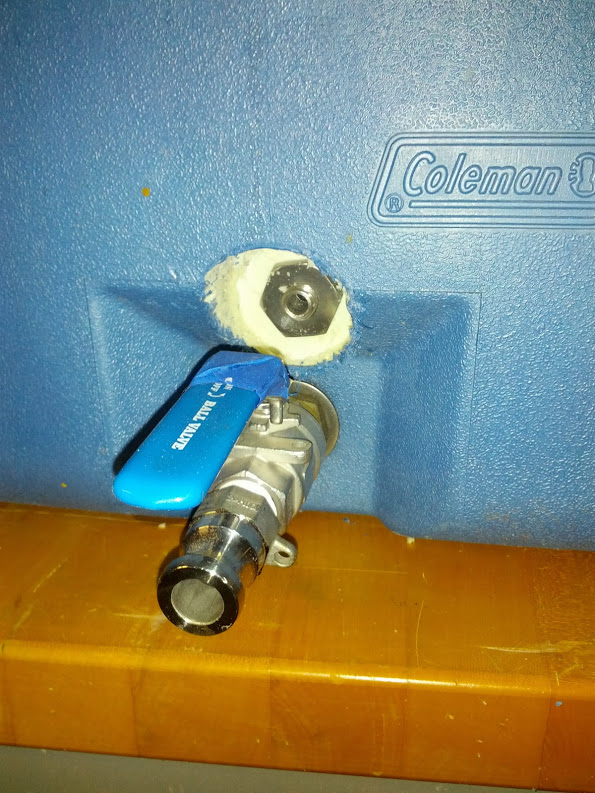
Simply use a bit to cut a bigger circle than the thermowell hex head. Remember you need to get a wrench in there to tighten it. I can’t tell you what I used because I have since given this MT away.
Next is the heat exchanger in the HLT. It’s just copper, you can DIY and bend your own, buy the MoreBeer version, or the Jada version or whatever other copper coil you find that fits your budget AND fits in your kettle. My kettle was aluminium, nothing fancy.
I don’t really have any photos that show this, but it’s pretty standard. Lastly you need a controller. If you’re spending all this dough at this point, you should have 2 stage temp control on your fermentation. I use a 2 stage Ranco controller, so I’d just take it off my fermenter, change the temp setting and use it for my brewday, using the hot side only. These days there are a lot of other options, just make sure the probe will fit through the MT thermowell.
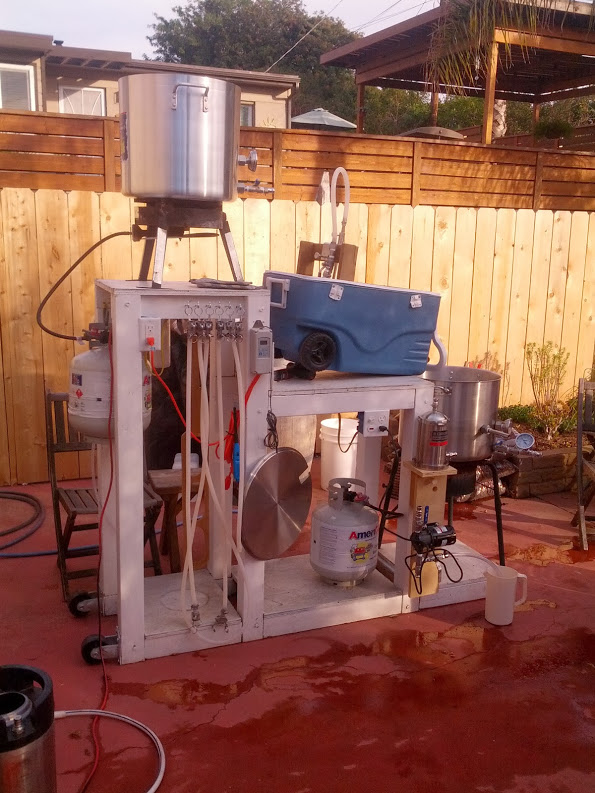
So this is my cheapo setup. It never caught on fire! The HLT is way high, which can be a concern so if the earth starts shakin’ you better start runnin’. I have more going on here so if you have a basic knowledge of household wiring, you can do the following.
Near the left propane tank you can see a red/black wire, that’s just a basic extension cord that I cut the female end off of, and wired it to the dual plugs with the orange (Ranco) wire plugged into it. That is then also tied into the dual plug setup above the lower propane tank. Just above it you can see a wire loop, this is a drip wire, just in case it gets wet, water will flow down to the lowest point of the wire and drip down, and not into your junction box. The switch turns on both outlets, so I can just leave my pump plugged into it for manual on/off without having to pick the pump wire off the ground to plug it in. Or the pump can be plugged into the controller to run the MT. Later in the brewday you’ll want to just plug it into the switch controlled setup. I used a switch with an indicator light, but this is 100% useless in broad daylight as it’s not strong enough to be seen.
The other nice part about using wood and the cam locks, if you want a hook somewhere, just drill and install one.
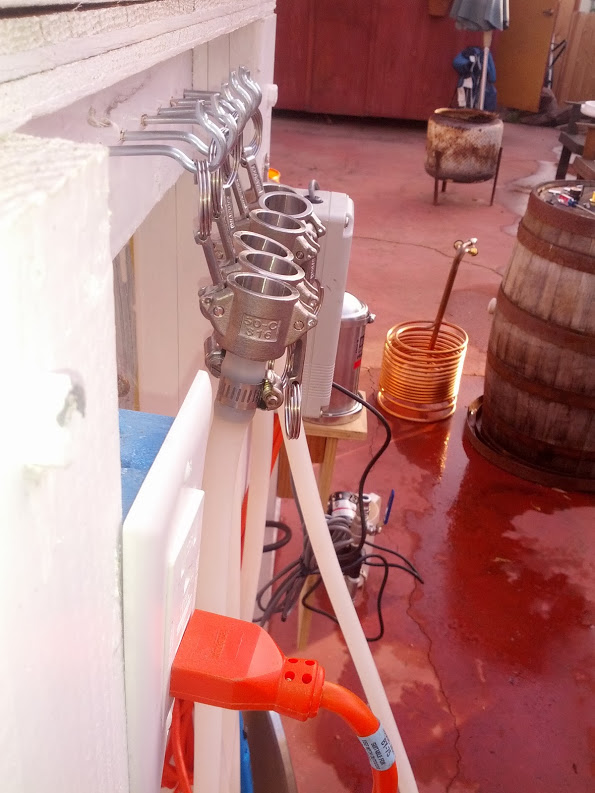
I miss this even as I now have a better system, managing your hoses is something I need to figure out. BC this rocked.
Other nice thing about wood is you can mount just about anything to it, including water filtration:
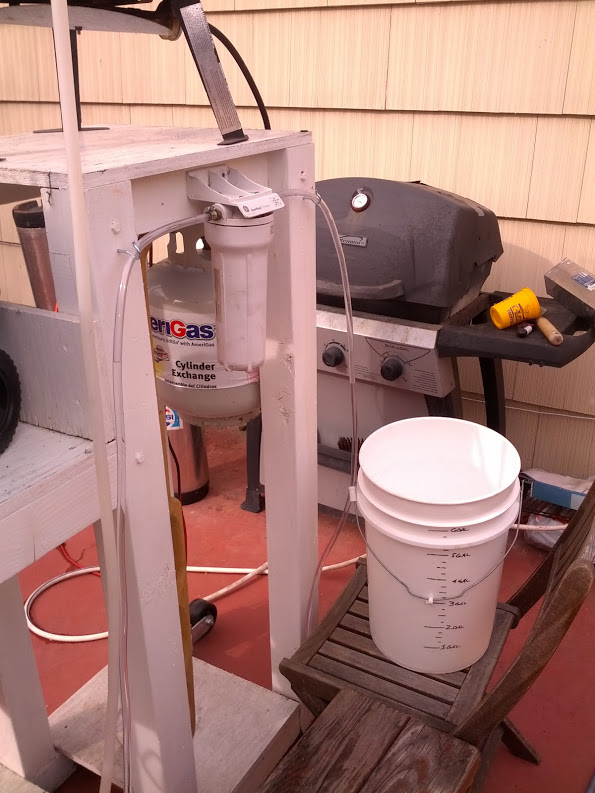
Keep everything in one place, this is just a carbon block filter.
As used during mashing, note that most of the hoses are now in use.
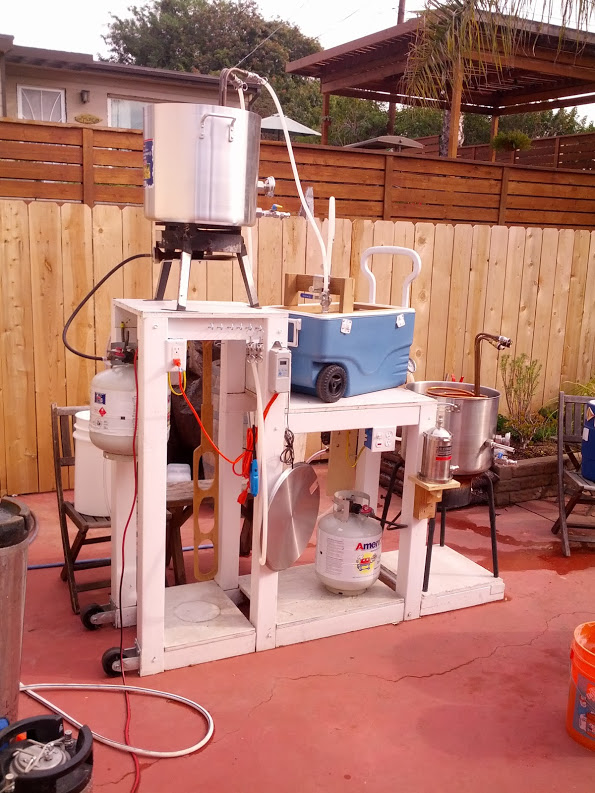
You’ll note the wheels, when it was empty and all hardware/propane was removed, I could tilt it up and wheel it over to storage. Was a fancy tarp. The chiller is in the BK, and when you would add it and 15min hop additions/whirlfoc, you’d also set the pump up to recirculate from BK ball valve to the pump and then back to the recirc arm on the chiller. This is a morebeer chiller (yes, I buy most of my crap from them).
Even when using ground water, the flow of wort past the coil makes chilling extremely more efficient, which is another reason to buy a pump, hosing and fittings. It just makes the day run faster and then you can pump wort directly into your fermenter, regardless of height.
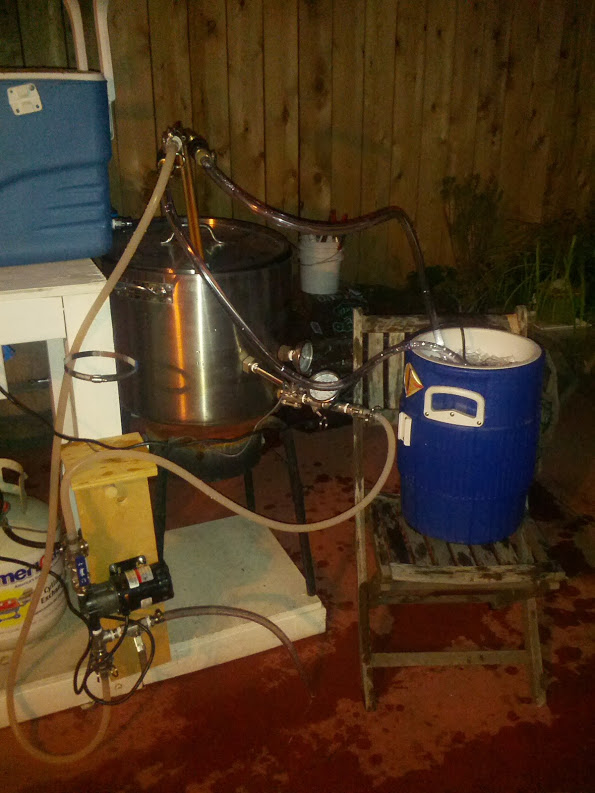
After knocking the hottest temps off and you get below 100F you can setup a ‘superchill’ setup. In this photo the wort if flowing from the BK valve, to the pump, and back to the recriculation arm on the chiller. Instead of hoses to the chiller, I have a closed loop running a large aquarium pump pushing ice water to the chiller and then returning it to the bucket. Both pumps are now on the same switched circuit, so when I kill it, they both turn off. Works super well and you have to be sure you don’t chill below your target wort temp. Because it is easy to hit lager temps with this. Uses about 10lbs of ice.
Note also the pump is now below the BK.
Building this is a lot cheaper than a sculpture, but you need some wood working tools, drills and electrical knowledge. It’s pretty easy overall and fun to build.
Have fun!
EW

[…] This design is based on the equipment I had. Still a work in progress and I’m waiting on an order from Brewer’s Hardware to get this rig fully functional. Stay tuned for Pt II. […]