


A big advantage of having your own mill at home is you can mill the grain on demand, stock certain grains that the local HBM doesn’t carry, you can set the gap as you’d like, vs. being a the mercy of the store’s mill and it’s kinda cool.
This is EW’s build. This is not the end-all, be-all of motorizing your mill. There are tons of options out there and this is the one I chose to do.
Tools Needed:
Drill, various drill bits
Jig Saw
Wood Square
Wire cutters/strippers
Wire crimpers or a soldering iron
Electrical testing kit
Allen wrenches
Paint (if you want, rattlecan)
wrenches/socket set
Materials Needed:
Mill
Motor
Switch
Cabinet/mounting surface
Wire
Bolts/screws
shaft sleeve
sheaves (2)
V-belt
3-wire power cord
The Mill:
The first thing you need to think about is budget. This can very greatly but the #1 item is the mill itself:
A) JSP Malt Mill Starts at $110, w/ 10″ rollers*
B) Barley Crusher Starts at $114, w/ 5″ rollers
C) Monster Mill Starts at $117, w/ 6″ rollers
But each comes with different options in terms of gap adjust ability, geared drives, hardened rollers, number of rollers (2 or 3) and hopper size. Generally somethings you’ll want (like adjust ability) and other’s you won’t (3 rollers is a bit overkill for the homebrewer).
Next up is building a base, some come with a basic option, but this can be as simple or as complex as you’d like. However, if you intend to motorize your mill, a more stable platform will be needed.
When it comes to motorizing you have 3 options:
1) Pay a buddy in beer to be your Mill Monkey and grind away with a hand crank.
-upside: cheap
-downside: you’ll run out of buddies
2) Use a hand drill
-upside: cheap
-downside: very hard on the motor, you have to hold it constantly and the changing in the torque of moving the drill can wear out bearings faster, as well as your drill will wear out faster due to how hot it will get.
3) Buy a heavy duty motor and wire it in to run, hands free.
-upside: more consistent crush, hands free, cool
-downside: cost

Having built a total of 5 motorized mills I can offer my insight into this process.
1) They’re not cheap
2) They’re a pain to get setup
3) cheap motors won’t work
Due to #2 I no longer build these.
My personal recommendation is the JSP malt mill > the barley crusher. I think the build quality is better and it’s much easier to build your own larger hopper as the rollers are longer. However, the longer rollers play a part in motor selection. I’ve never used a monster mill.
The Motor:
Now that you have an idea of where you want to start you need to start looking at motor selection. Unless you have the bucks to buy a new Leeson or Baldor motor, you’ll be looking used. It’s my believe that bigger is better, but not too big (for power supply reasons). You’ll want something in the 1/3rd to 1/2 HP range. And if you’re looking used, you want a 1 phase (1 PH) motor, the other option is 3 PH and that’s for industrial uses, your home is not supplied with 3PH power.
So now you know the HP requirements, but there’s a lot of other info out there. 1st, you want a type 56 frame, all this means is that it has a base plate built into it for mounting. You do not want a face frame mount, unless you can weld and you’ve got some mad crazy design in mind.
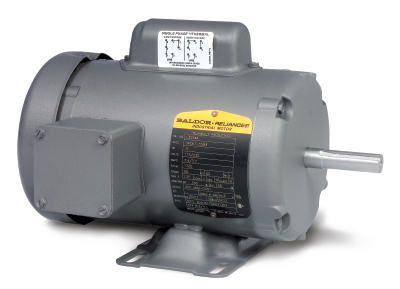
You’ll also want a TEFC motor, this stands for Totally Enclosed Fan Cooled, this will prevent the flour from the milling process getting into the wiring and is generally safer. The motor shown is a Baldor 1/3rd HP, Type 56, TEFC, 115v motor, or something you’ll want. Brand new it costs $353. If you hunt, you can buy a used motor for $50 to $100.
Next is the shaft speed of the motor, generally they come in at 1750 and 3700 RPM. You’ll want the slower of the two which ranges from 1400 to 1800, not 3700RPM range. Due to the sheaves (pulleys) we’ll be using there are limitations per standards as to how big you can purchase depending on the diameter of the motor output shaft.
There is an option you’ll find out there for geared motors, which have reducers built in. With a ~1750RPM motor we’ll be able to slow it down to 260-280RPM, but if you want slower to at or below 100RPM you’ll have to shell out more bucks on a geared motor.
*note on using the JSP w/ 10″ rollers. The crushing surface is twice as wide as the barleycrush, which means you may have 2x as much malt being crushed which drastically increases the resistance on the motor. Thus your motor needs to be beefier and with more torque in order to crush the grain.
Gearing:
Gearing down a ~1750rpm motor is done through the use of sheaves. A sheave a a powered pulley, not sure why they’re called something different because they look exactly the same. This is where things get a little tricky due to the shaft dia on the motor and the mill. They generally won’t be the same. However, you’ll always want the smallest diameter sheave on the motor, and the largest on the mill. By slowing down the motor you’ll increase torque which is what you need in order to crush the grain.
Due to some mechanical standards, which I won’t even pretend to understand, depending on the shaft dia you can only get a sheave with a diameter of so big. For instance, you won’t be able to get a 20″ sheave for a shaft dia of 1/4″. This is why there are some limitations of how slow you can get mill to run if using only 2 sheaves. While it is probably possible to slow it down further, I do not have that ability or mechanical aptitude to even try.
There was a great explanation off the JSP malt mill site, but that page is no longer available. I emailed Jack Schmidling and this was his reply:
MOTORIZING A MALTMILL
For reasons of product liability and greedy lawyers, we do
not give recommendations on motorizing our product. It is
shipped with a handcrank and it is presumed that if a user
wishes to motorize it, the user assumes the responsibility
and risk. We expect the user of such a modified mill to call
a doctor and not a lawyer in the event that injury results from
motorizing it.
We can however, provide information that users have found
to work well.
The mill should not be run beyond about 500 RPM as the
efficiency starts dropping at around this speed because malt
is thrown around rather than being fed through the rollers.
The easiest but least desirable method of motorizing is to use
an electric drill if it has sufficient torque to drive the mill at the
above RPM.
If a drill is used, two additional flats should be ground on the shaft
120 degrees apart to provide proper seating for the 3 jaw chuck. The chuck
must be kept tight at all times or the hardened jaws can chew up
the end of the roller shaft. The weight of a heavy drill or leaning on it
can bend the shaft. If something hard gets stuck in the rollers, either the
rollers or the drill can be damaged.
N.B. THE LIFETIME WARRANTY WILL BE APPLIED AT OUR
DISCRETION IF DRIVEN WITH A DRILL.
The ideal way to achieve a reasonable speed is to put a 3″
pulley on a 1700 RPM motor and a 12″ pulley on the mill.
Connecting the two with a V-belt will provide about 425 RPM.
(3/12 X 1700=425) Just about any size motor will operate
the mill but 1/2 HP is probably ideal.
Large pulleys with 3/8″ bores are hard to find so you will need
to purchase reducers to accommodate the 3/8″ shaft on the mill.
The feet can be removed from the base and the base screwed
to a larger board with the front of the mill hanging over the edge.
This provides room to mount the motor behind the mill.
……….
The dangers to be aware of are the following:
Belts and pulleys have been known to remove fingers and that
is why machines so equipped have belt and pulley cages.
Dust can be explosive and that is why explosion proof motors
have been invented.
The rollers are designed to crush things. The finger guards that
are installed on the mill are to keep fingers out of the rollers.
DO NOT REMOVE THEM.
Turning a crank might be a pain, but so are crushed fingers.
js
So from memory, you want your mill to crush under 300rpm. If you’re worried about crush quality and shearing action, then I suggest ordering a gear-option mill which turns both rollers at the same speed. The downside to that is only 1 side of your mill gap can be adjustable.
The quick math for figuring out speed:
(OD of motor sheave/OD of mill sheave) x (RPM of motor) = roller RPM
so
(3″/12″) x (1700rpm) = 425RPM. Which is too fast.
(1″/12″) x (1700rpm) = 141 RPM. Which is much better.
Sheaves:
You will be buying 2 sheaves, and they both need to be V belt driven. This transmits power much more efficiently.
Determine the shaft dia of your mill:
JSP: 3/8ths
Barley Crusher: 3/8ths
Monster Mill: 3/8ths
Well that makes that easy. Except with a 3/8ths bore, the total OD dia for the sheave is limited to about 4″, which is not anywhere remotely close to enough reduction in speed that we’re looking for. The solution is a shim to increase the dia of the mill drive shaft to 1/2″. Then the sheave possibilities open up. Ideally you’re looking for 10-12″.
Steel Sleeve to adjust 3/8″ shaft to 1/2″ Shaft Grainger (part#4×664)
1/2″ bore 12″ OD Sheave Grainger (part#3×938)
To find the sheave for the mill drive shaft go here: Grainger and then you’ll enter the OD of the bore, then choose a pulley with 1 groove, the select the outside OD to get what you’re looking for.
You’ll also need a 3L or 4L drive belt, the distance should be calculated before, but the length on mine is:
Electrical:
You’ll need a cord (3 prong), a switch and misc wiring to wire the switch to the motor.
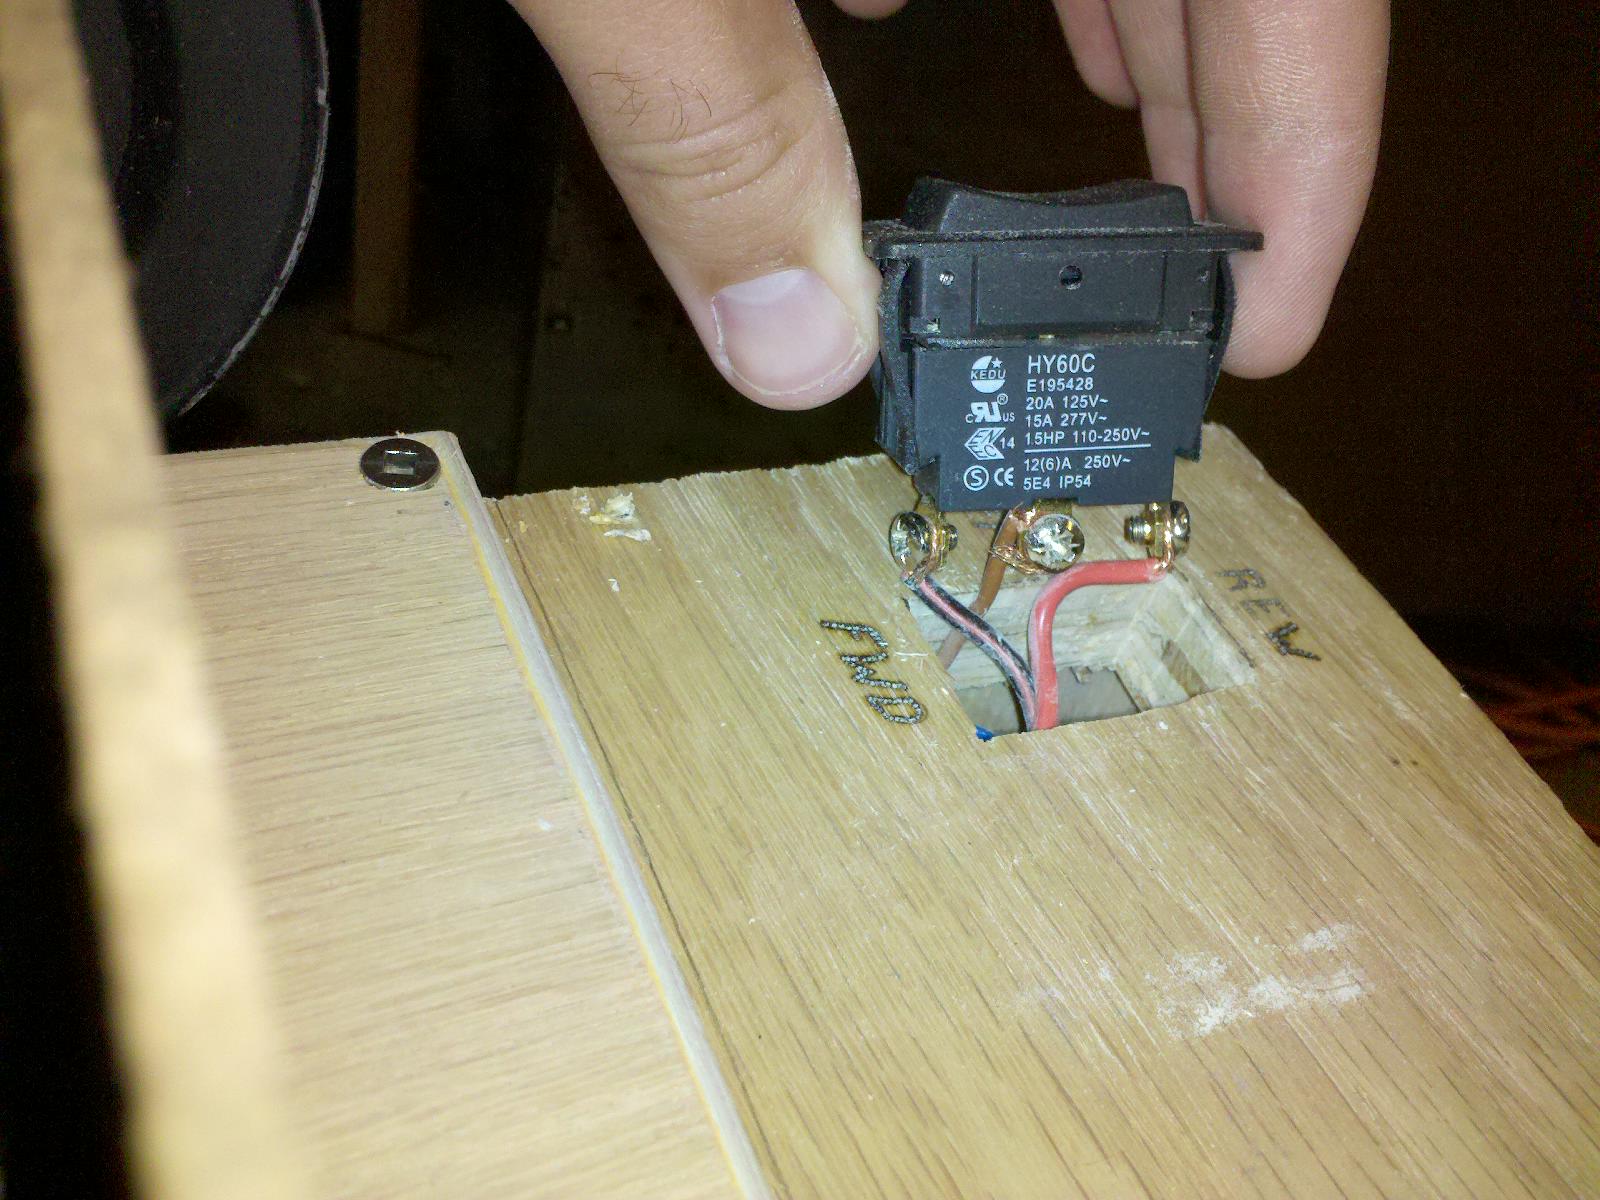
Some motors are both CW and CCW (clock-wise/counter clock-wise) in direction. If you want a switch that has a off and both forward/backward you’ll have to figure that out. I’m no electrical expert and a lot will depend on the motor you buy, they can be anywhere from 3 wire to 7 wires.
Your cord will have 3 wires, a Ground (green or bare), Hot (black) Neutral (white). All the ground wires should be connected through the switch. Your Neutral wire doesn’t go through the switch, you just wire that directly to the motor neutrals. The Hot wire will go through the switch generally to a center position, and then the either ends will be wired to the motor for forward/reverse. You’ll have to read the wiring diagram that comes with the motor to really figure out which is which and why I won’t get too deep into it here.
Soldering the wires is more ideal that crimping, and using heat shrink wrap or electrical tape to prevent any shorts.
Momentary switches are spring loaded and only operate when held ‘on’. As soon as you release, they stop working.
Maintained switches are your typical on/off.
Machine switches are generally safety switches, “pull on” “slam off”, so they have a bigger surface area so it’s easy to turn off. However, they are generally 1 directional, so you’d have to have a 2nd switch for the direction.
McMaster Carr switches
Grainger switches
Cabinet:
Many options here, depends on what you have space for or want to do on the cheap. The only thing to consider is where the 10″ sheave will go and what size bucket you plan to use. A multi purpose Home Depot utility bucket is shorter and fatter than a food grade bucket you’ll find at HBM. Just make sure you know which you want to use. I designed mine around a utility bucket not knowing there’s a difference, and because of that, I cannot use a food grade bucket unless I change my cabinet.
Assembly:
So now you finally want to assemble your mill.
Everything needs to be square so the mill sheave and motor sheave are in the same plane. The easiest way to do this is to square everything off of your cabinet.
1) attach the sheave to your mill. There will be a set screw and you’ll need an allen wrench to tighten it down onto the flat portion of the drive shaft. Once this is attached you can insure you have enough clearance for the entire unit. Then set the mill on your cabinet and make sure it’s square to the edge.
2) trace the footprint of the mill onto the cabinet top. Then measure in from the edges the width of the sides of the mill (metal) support, this is what the rollers are attached to. There is a threaded hole and you need to mount the mill on somehow. What’s left will be the large hole you need to cut out with a jig saw for the grain to fall through. If you cut the hole too small this is the result:
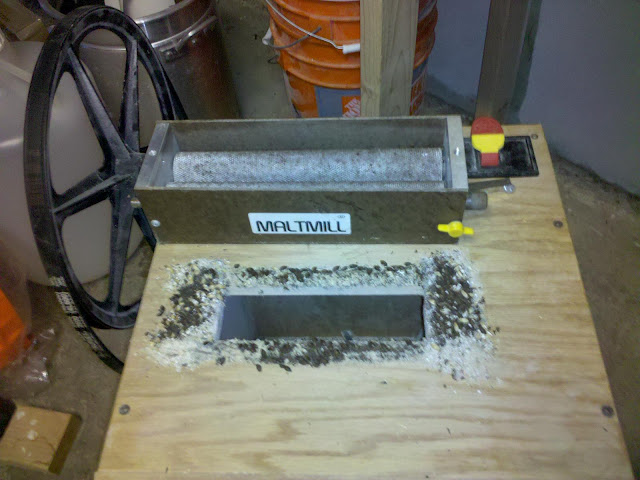
This will attract bugs/mice etc…
3) mark the locations of the holes to drill to mount the mill to the base.
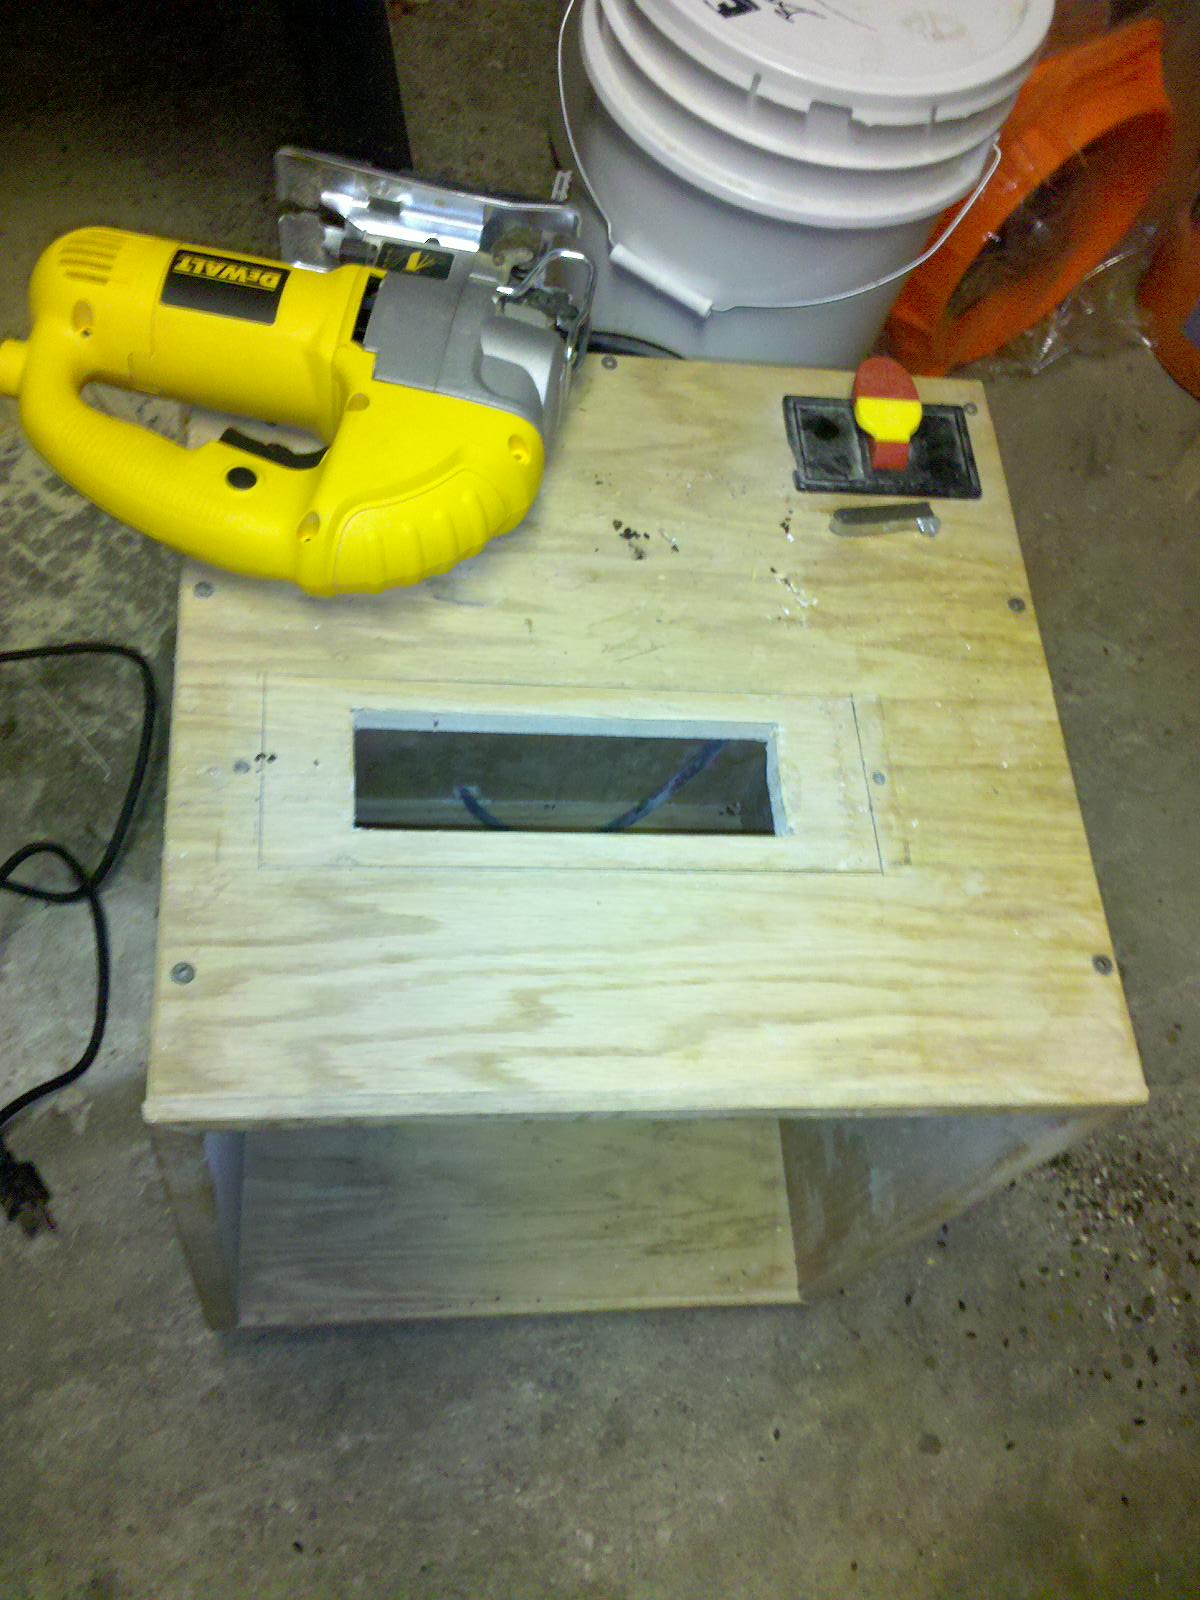
In this photo you can see the outline of the previous markings for the footprint, and where I drilled through the mounting holes. I measured over to see where the hole had to be expanded to and then re-cut:
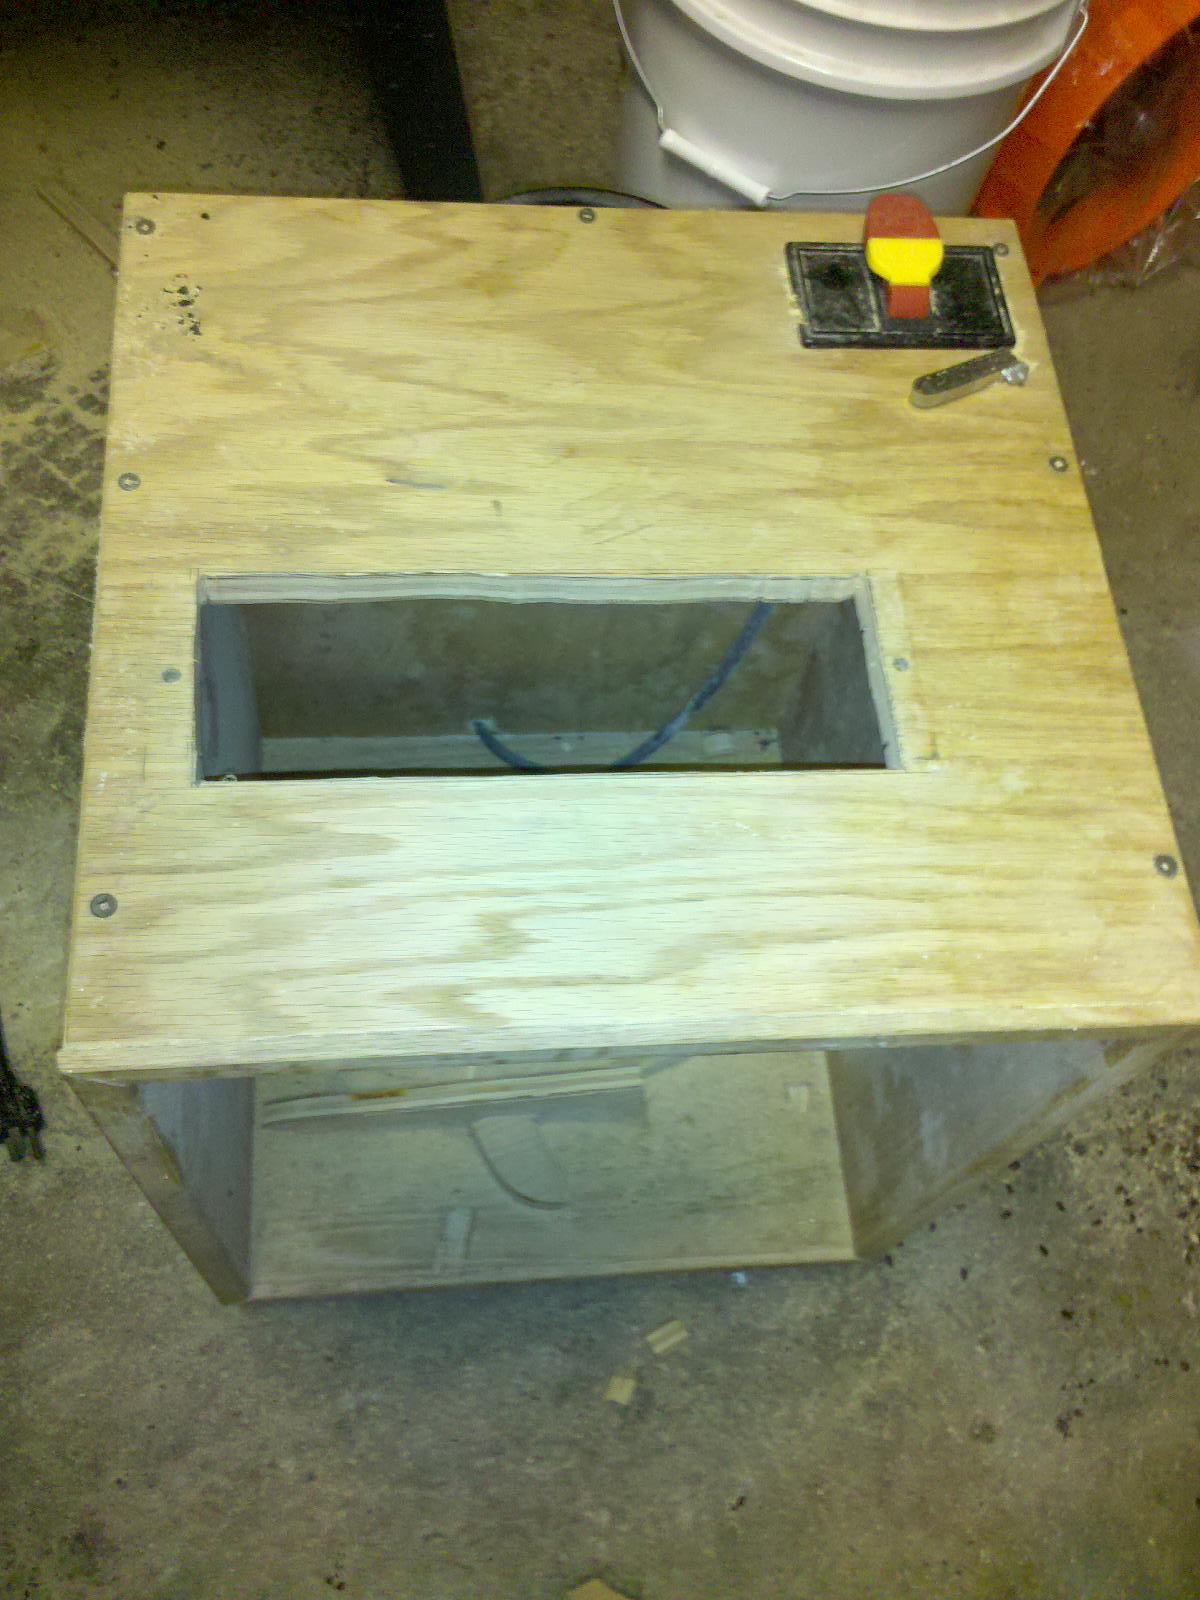
Now all the grail will fall directly through and into my bucket.
4) depending on your switch, you may need to drill holes for it as well.

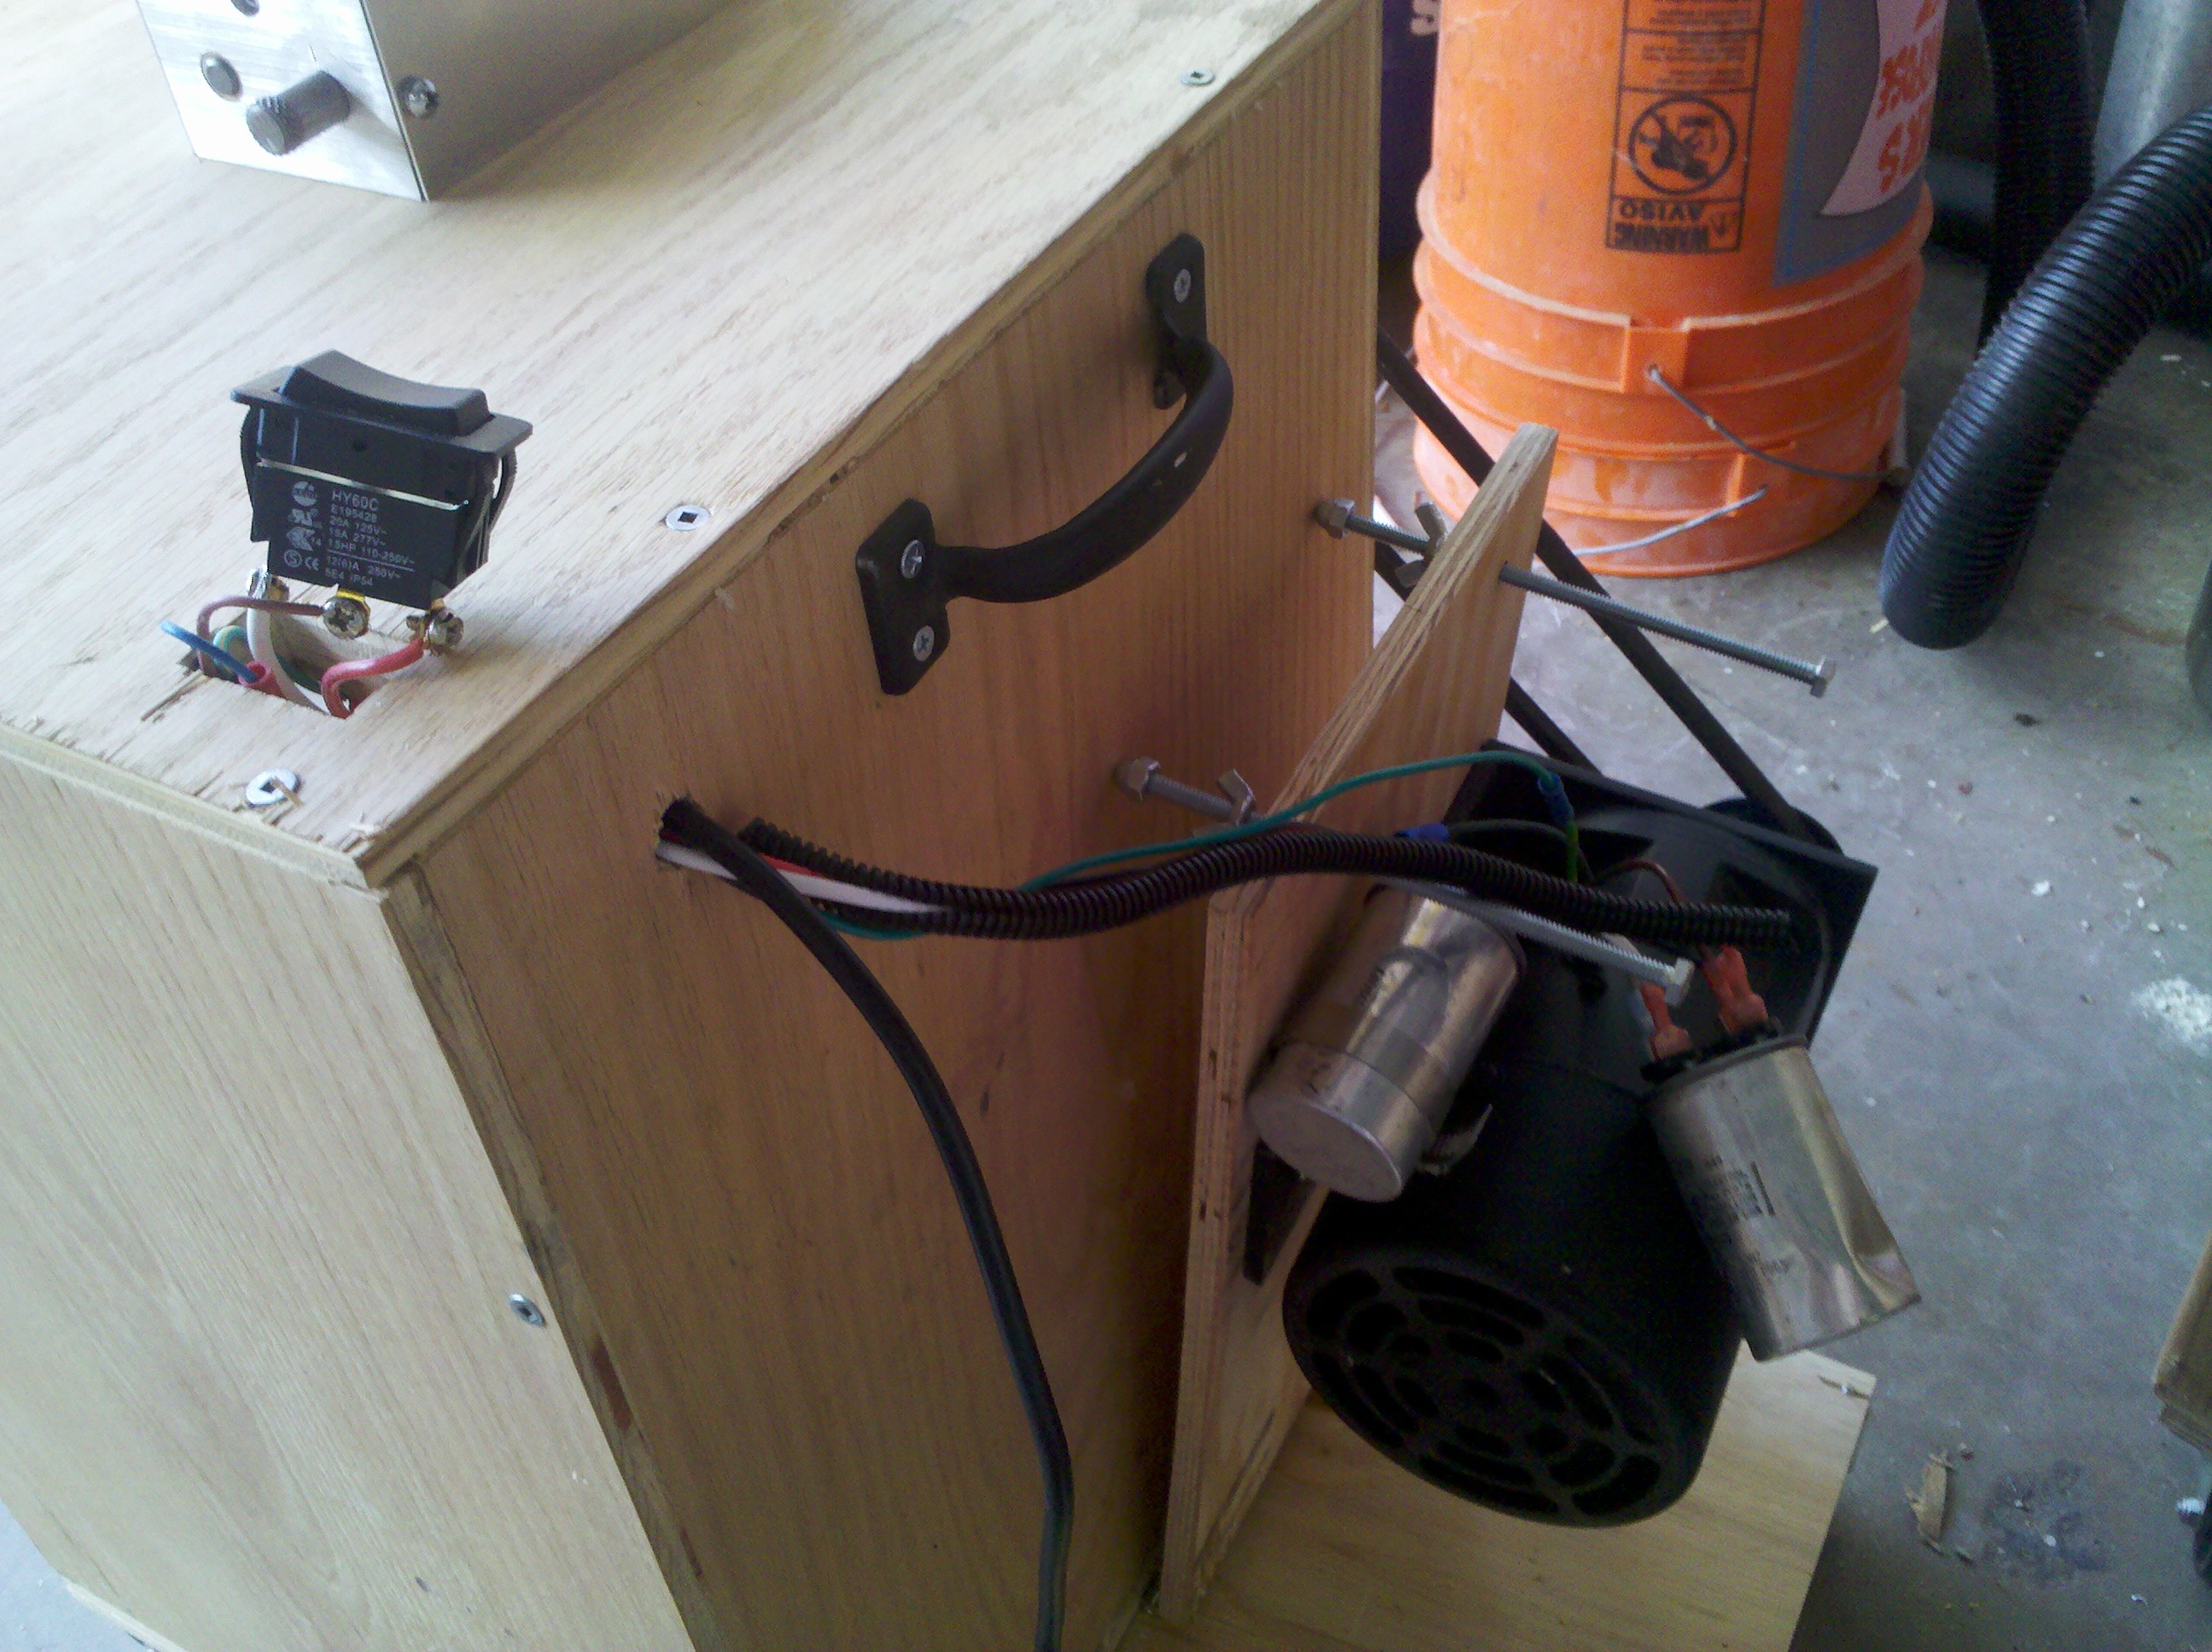
5) mounting the motor. In my mills I’ve used a small board using 2 hinges attached to the bottom of the cabinet so the tension can be adjusted. This also allows the belt to act like a clutch (and a better design than direct drive) in case something binds the mill up you won’t destroy your mill or motor. Again, attach the sheave to the board and use a yardstick and square to get that puppy as square as possible.
In this photo you can see 1 motor mounted on the left, and the 2 boards on the right w/o motors attached. These motors are on the small side and they all suck. I’ve also extended the base of the mill setup, as the weight of the motor tends to make the entire unit very tippy.
There’s a way to do a cheap tensioner as well using threaded bolts. These are also geared motors turning Much slower, thus the need for small sheaves.
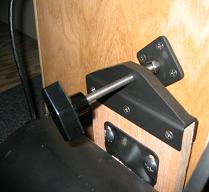
Here’s a closeup of the tensioner:
Tensioner.
Threaded bolt + wing nut + acorn cap + threaded thing that you pound into the wood. All from Home Depot.
My custom tensioner I had made:
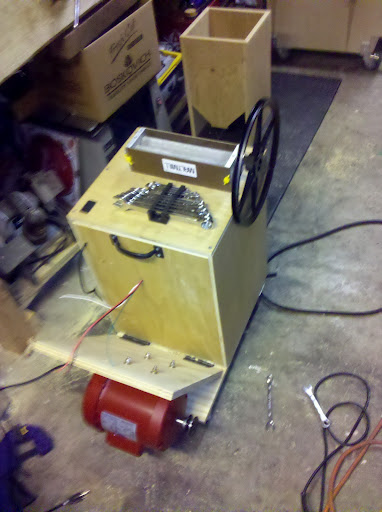
Leeson motor
In this photo, you can see the much larger replacement Leeson motor. This replaced the smaller black gear driven motors, and thus required a larger sheave. Without the V-belt, the motor falls backwards and which is why an extended base was added to keep the unit from tipping backwards.
After that, you just drill holes for however you want to wire it and it’s done. If needed, build a larger hopper. Easier on the JSP due to the width of the mill, much harder for the barley crusher as you need another panel inside to feed the grain over.
The possibilities are endless when it comes to building a motorized mill. From belt-driven to direct-drive, any possibility of cabinets/mounts and switches.
SAFTEY
Don’t be an idiot! Even though these are small HP machines, they are designed to crush and have moving parts. If you have children or drunked idiot friends, build a guard to go over your rollers and another around your moving sheaves/belts. Also: do not wear a necktie while operating.
Links for ideas:
Mullerbrau for a belt driven
Sam’s for direct -drive
The article I used to build my setup: Mike Dixon

As it turns out, my motor that has lasted the last 4 years I think is underpowered and tiring out. So I’m now looking to upgrade to a 1/2 HP unit and I’ll post my findings here later.
Thanks for all your all your ideas. They’re going to be very helpful when I build my new mill setup. I had purchased a Monster Mill (MM3) a while back and I’m now getting things together. Also, thanks for the Grainger part numbers! I’ve been struggling the last few days trying to find a pulley large enough with a 3/8″ bore. I already knew that power would be an issue so I managed to get an almost new A.O. Smith 1/2 HP, 1720 RPM explosion proof motor for $145 on E-Bay. Again, thanks for all the ideas.
That addersses several of my concerns actually.
Willie,
If you’re interested, I have another ‘mill box’ that’s ready to roll to mount your Monster Mill to. Contact me off list.
EW