


There are 2 reasons you’d want to convert a mini-fridge:
1) turn it into a kegerator
2) turn it into a temp-controlled fermenter
In either case finding a refrigerator only (no freezer) is the easiest option. Bending and moving a freezer inside a dorm fridge is not something I’ll cover. If going the kegerator route the one thing you need to do to serve 2 corny kegs is to drill the top, make sure you don’t drill through the back 1/3 of the top as there is 1 coolant line for Sanyo/Kenmore brands.
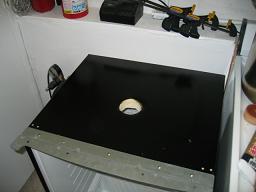
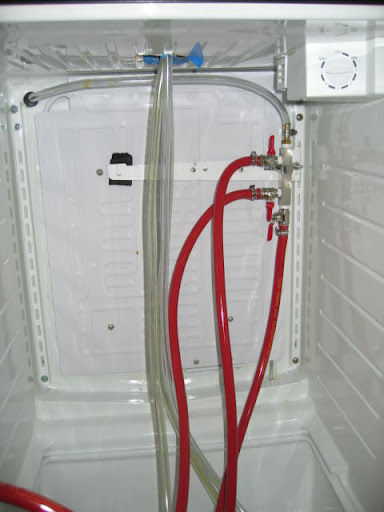
I personally prefer to keep my CO2 tank outside the kegerator and the best place to drill a 1″ hole is through the top left corner to avoid hitting any coolant lines. Drill from the inside out.
You can use gaskets but the tubing is thick enough and the movement small enough it won’t cut through your line. I the pick above I bent the metal shelf support at 90* and then drilled a hole to match a mounting screw for the cold plate. The black thing is a piece of neoprene to keep the bracket from rubbing against the cold plate. Then I had something sturdy to mount my gas block to.
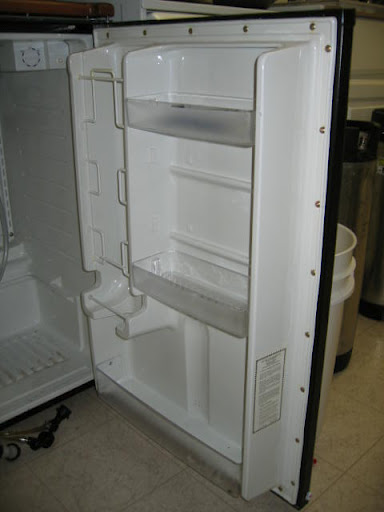
In the case you want to have 3 kegs in your little fridge (2 five gallons and 1 three gallon) you’ll need to remove the shelving off the door. This is a little more involved but you can accomplish this with simple hand tools.
First you need to peel back the gasket, without damaging it, covering the door to expose the screws.
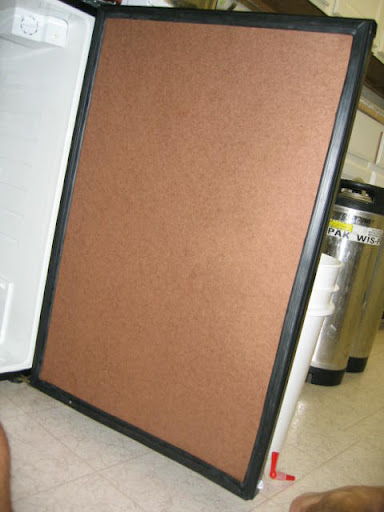
Then you want to remove all the screws and set them aside. Next you will have already bought a 2’x4′ sheet of hardboard from Home Depot. Place the plastic door shelving on it, and trace an outline onto the hardboard. At the same time, mark the location of all the screw holes onto the hardboard. Discard the plastic shelving.
Next you want to take either a jigsaw or a razor utility knife and cut out the door via the outline you traced on. I did it with a utility knife (sharp) and it took several passes to get it to cut through. Next you’ll take a hand drill with a big big enough for the screw to fit through, and drill out all the screw holes.
Finally you want to mount the hardboard in place and screw in the fastners you saved about 1/2 way in, you want a little space left so you can re-attach the gasket. I worked from the top down in placing the gasket on, then gently push it back and tighten up all the fastners.
The hardboard acts as both structural support for the door and to remount the gasket to.
If you are intending to use the mini-fridge for fermenting carboys in, you’ll need to replace the shelving. I use a thermowell and a 2 stage controller to dial in the temps. The wire just fits between the gasket and door, no need for any crazy modifications there.
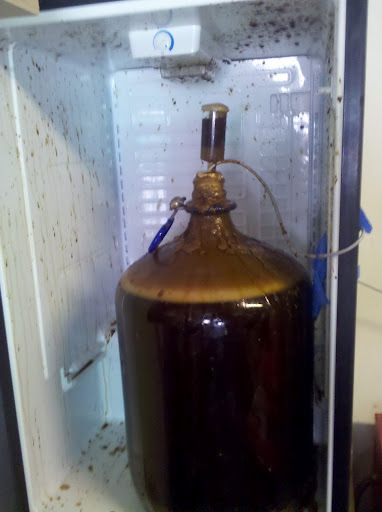
To avoid messy explosions like this, always use a blow-off tube going to a 2nd jar. You can put a 1 gallon jug inside the fridge if you push the carboy to one side and sort of rest the other jug on the back shelf, it’ll tip forward but the carboy will stop it from falling. Fill it with 1/4 sanitizer and you’re good to go.
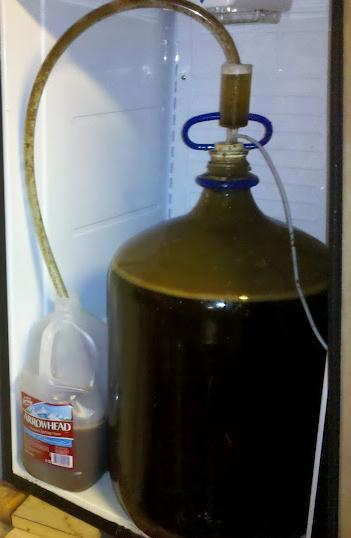
Much cleaner, although somehow the airlock was still filled with a little beer, I think it’s because I didn’t fully clean it out and just filled it with sanitizer because I was being lazy.
You can also get fancy by replacing the plastic top with something that looks MUCH nicer. In my case my dad used leftover brazilian cherry to make me a top with a sunken area for the drip tray.
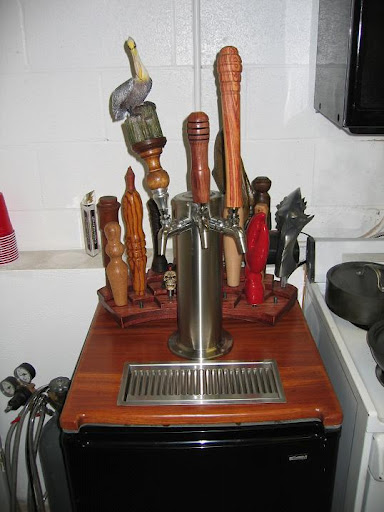
I bought my tray and 4″ tower from ACU MetalFab. If I were to do it again, I’d have bought the wrap around sunken drip tray in order to catch more drips. You can have one that drains, but it would require more drilling and a reservoir. If you want to hide the CO2 tank, just use a longer thick walled tube and put it somewhere remote.
Pretty simple stuff.
-EW
